.png)
We recently upgraded our phone system, and while the network was being updated, I was temporarily connecting my laptop to our guest network so I could access the Internet without interruption. After the updates were completed, I switched back to our office network and all was well.
The next day I arrived at the office and everything was working fine until I discovered I couldn't print. At first I though some printer settings had changed when phones were added to the network, but it turned out that I had the same problem we get so many customers calls for... I was connected to the wrong wireless network! My laptop automatically connected to the guest network when I arrived in the morning and I didn't notice. Being busy, I switched it back. Next morning the same the same thing happened, and I realized I had to update the network priority. We're so busy taking care of clients, sometimes we forget to take care of ourselves!
Changing the wireless network priority is easy:
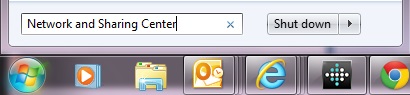
- Click on the start menu and type Network and Sharing Center:
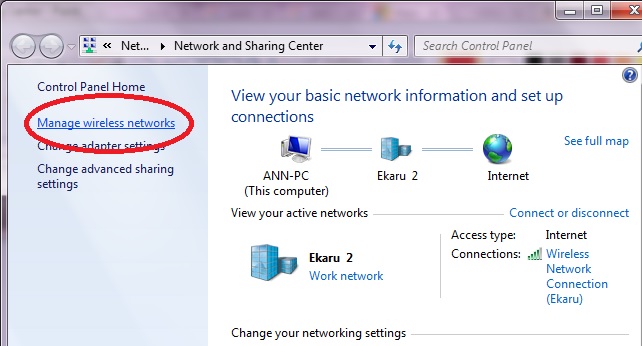
- In the Network and Sharing Center click "Manage Wireless Networks":
- Click on the network to be given priority then select "Move Up".
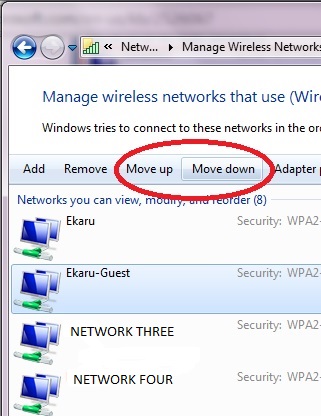
Note that in the example, the target network has been moved to the top position. The Move Up / Move Down buttons are highlighted to illustrate how changes can be made.
After setting the proper priority, I will always connect to the right network even when I'm in range for an equally strong signal from our guest network.